
Date:
静的ジェネレーターHugoを使う
このサイトはブログシステムにHugoを利用して運用してます。今回初めてHugoでテーマ作ってみたので、Markdown基本でたまに書き方を忘れてそのままHTMLコード書きたくて、画像はPhotoshopで作って、なんとなくディレクトリに整理して入れたい人には向いてるんじゃないかなということで紹介します。
Hugoとは
golangで作られた静的ジェネレーターです。他の言語で作られたHexoやMiddlemanとかJekyllなどありますが、Hugoはシンプルさが売りで他のツールのようにデプロイコマンドはありませんが、HTML/CSSを出力する動作が早いということで、再構築に苦しまないために選んでみました。
個人的なメリット
- 記事がMarkdownで書ける
- ログインがいらない
- Git管理できるのでgit pushだけでデプロイできる
- テーマが自由にカスタマイズできる
元々WordPressのブログはあるんですが、長文をWYSIWYG上で書くのがそんなに得意ではなく、エディターなどで記述したものを管理画面にコピペしてたのでそれならそもそもエディターで書いたものそのままアップできれば早いんじゃないか、と。なので書籍の執筆もエディタで書いています。
今回の構築環境
- macOS
- git
- homebrew
Hugoのインストール
macOS/Windowsに対応しています。
macOS
homebrewでインストールできます。
$ brew install hugo
Chocolatey (Windows)
WindowsはChocolateyというパッケージマネージャーがあるのでそれを使うとよさそう。
$ choco install hugo -confirm
使い方
ローカル上の任意の場所でブログを作成。
$ hugo new site my_blog
Congratulations! Your new Hugo site is created in /Users/raymdesign/my_blog.

Just a few more steps and you're ready to go:

1. Download a theme into the same-named folder.
   Choose a theme from https://themes.gohugo.io/, or
   create your own with the "hugo new theme <THEMENAME>" command.
2. Perhaps you want to add some content. You can add single files
   with "hugo new <SECTIONNAME>/<FILENAME>.<FORMAT>".
3. Start the built-in live server via "hugo server".

Visit https://gohugo.io/ for quickstart guide and full documentation.

$ cd my_blog
my_blog以下は下のようなディレクトリに。
.
├── archetypes
│   └── default.md
├── config.toml
├── content
├── data
├── layouts
├── static
└── themes
Git管理におく
Gitで管理しておくとデプロイもGit連携で任せられるので先に設定しておきます。
$ git init
Initialized empty Git repository in /Users/raymdesign/my_blog/.git/
テーマを選ぶ

上記サイトで好きなテーマを選びます。日本の方で作ってあるテーマがあったので今回はそれをいれてみます。
$ git submodule add https://github.com/dim0627/hugo_theme_robust.git themes/hugo_theme_robust
$ echo 'theme = "hugo_theme_robust"' >> config.toml
記事を投稿する
最初の記事を投稿するのにmdファイルを作成。
$ hugo new posts/my-first-post.md
/Users/raymdesign/my_blog/content/posts/my-first-post.md created
content/posts以下にmdファイルが生成されました。
---
title: "My First Post"
date: 2017-12-21T11:08:23+09:00
draft: true
---
titleはファイル名から、dateは作成日時、draftは下書きフラグ。
記事の画像
画像などはstaticフォルダに入れます。
1.
2├── archetypes
3│   └── default.md
4├── config.toml
5├── content
6├── data
7├── layouts
8├── static
9└── themes
---
title: "My First Post"
date: 2017-12-21T11:08:23+09:00
draft: true
---
これは初めてのブログです。

パスはstaticを抜いたルートパスで書きます。
プレビュー
簡易Webサーバ機能があるので下記コマンドを実行することでローカルでプレビューすることが出来ます。あとオートリロード対応なので、記事ファイルを更新すると勝手に更新されます。便利。
$ hugo server -D
http://localhost:1313/ にアクセスします。

サイト名など設定する
config.tomlを編集します。
1  .
2├── archetypes
3│   └── default.md
4├── config.toml
5├── content
6├── data
7├── layouts
8├── static
9└── themes
baseURL = "http://example.org/"
languageCode = "en-us"
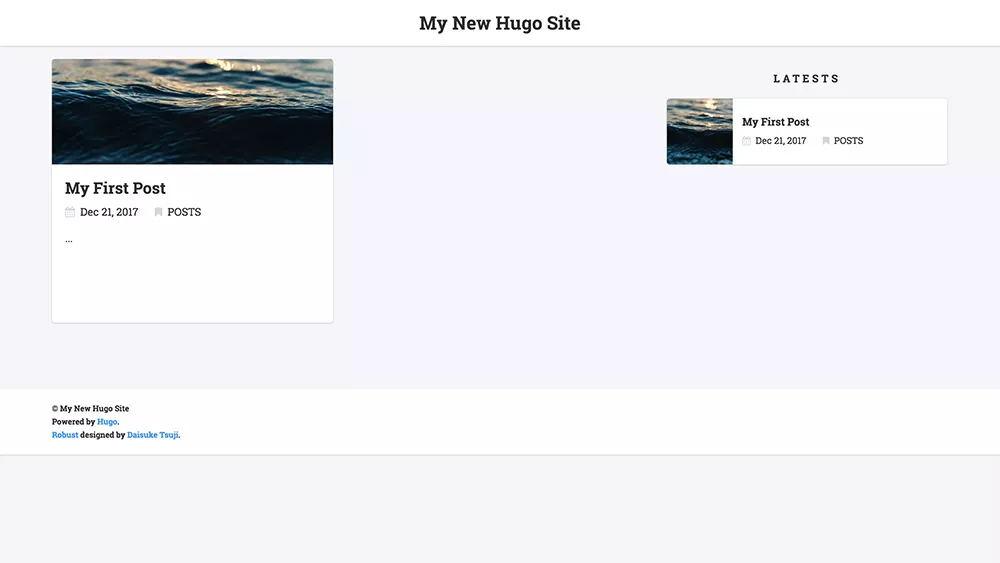
title = "My New Hugo Site"
theme = "hugo_theme_robust"
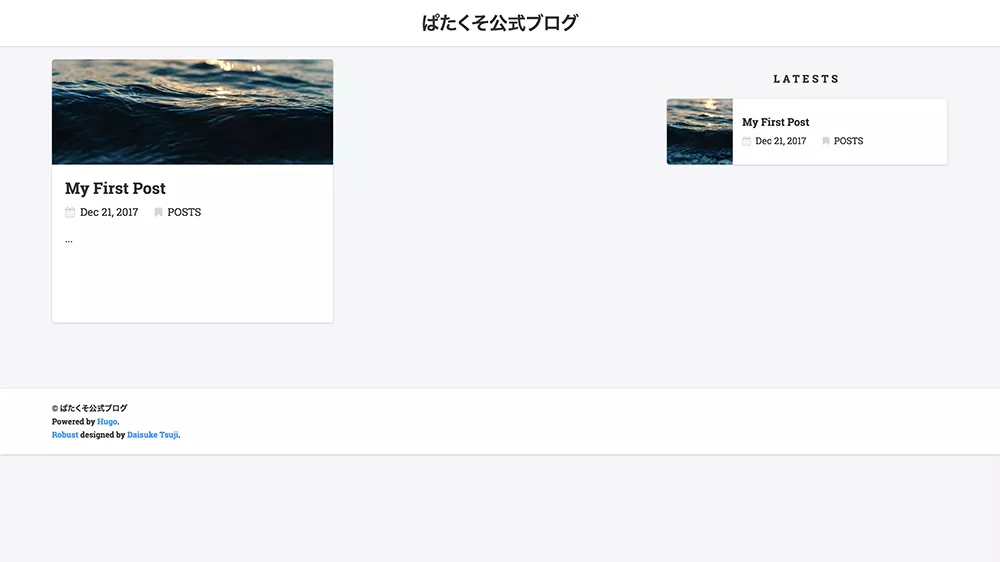
下のように変更。
baseURL = "http://blog.patakuso.com/"
languageCode = "ja"
title = "ぱたくそ公式ブログ"
theme = "hugo_theme_robust"
HTMLを生成する
$ hugo
Started building sites ...

Built site for language en:
0 of 1 draft rendered
0 future content
0 expired content
0 regular pages created
6 other pages created
0 non-page files copied
0 paginator pages created
0 categories created
0 tags created
total in 6 ms
public以下にhtmlが生成されました。
.
├── public
│   ├── 404.html
│   ├── categories
│   │   ├── index.html
│   │   ├── index.xml
│   │   └── page
│   │       └── 1
│   │           └── index.html
│   ├── images
│   │   └── default.jpg
│   ├── index.html
│   ├── index.xml
│   ├── page
│   │   └── 1
│   │       └── index.html
│   ├── sitemap.xml
│   └── tags
│       ├── index.html
│       ├── index.xml
│       └── page
│           └── 1
│               └── index.html
あとはこのpublicフォルダをホスティングサーバにアップすれば完了です。 ここまでの手順は公式にも動画があるので参考になるかと。
https://gohugo.io/getting-started/quick-start/#recapitulation
次回はホスティングサーバとの連携を書きます。